
A few years ago, editor Carl Schuubiers had a question about keyframe placement during a dissolve. Carl was dissolving between two photos being moved “Ken Burns style” with Position and Scale keyframes. He had no trouble when doing the original moves by placing the keyframes at the very edges of the clip. However, when he added a dissolve to a motion control move like this, he could see the outgoing clip stop and the incoming clip start during the animation. Carl didn’t want this. What he wanted to do was place the keyframes placed outside of the dissolve, so the viewer couldn’t see stops and starts, making the animation appear smoother and more seamless.
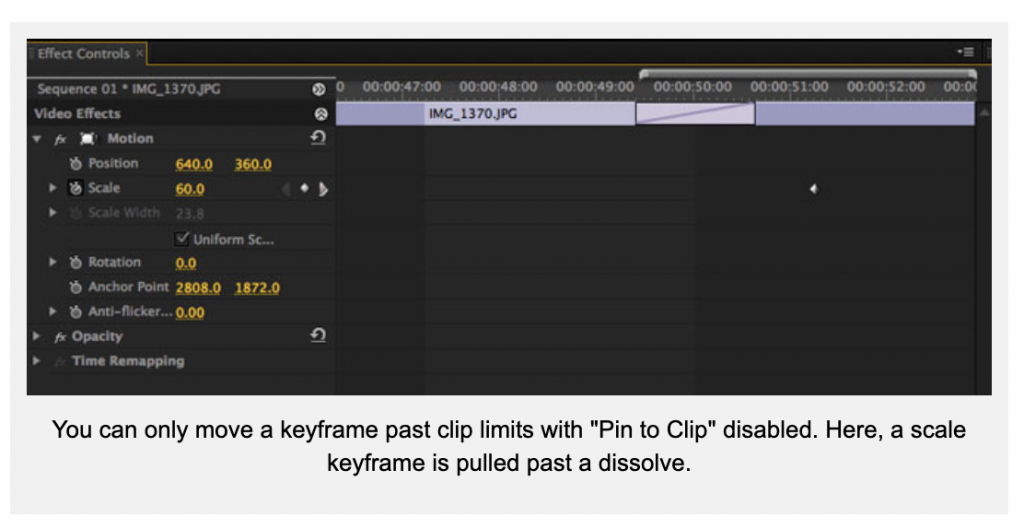
There is only one problem with the idea of placing keyframes outside of the dissolve. By default, you can’t move the keyframes beyond the clip limits in the Effects tab of the Source panel. So how do you move keyframes outside the clip limits so that you could achieve a smooth motion control move?
Fortunately Ann Bens, Premiere Pro editor extraordinaire had this to offer, “Uncheck Pin to Clip” in the panel menu in the upper right area of the Source Monitor. This will give you room to adjust the keyframes in the Source panel. Great! Now you have access to keyframes outside the clip’s limits and can place them just where you want.
To add to Ann’s advice, adjust the magnification in the Effects tab of the Source panel in the lower left corner of the Effects tab so that you can see beyond the clip’s limits and then will be able to manipulate the keyframe as you see fit.
Adobe Premiere Pro documentation on Pin to Clip is here.